After completing this lesson, you'll be able to:
FME Flow security and permissions work together to restrict and allow access to FME Flow items. It's essential to ensure users have access to the items they're supposed to, and oftentimes, only the admin account has access to all items on an FME Flow instance.
You have full permissions when you create an item; however, that does not mean your colleague can access it when needed. Depending on the permissions set up for each user to access FME Flow items, the easiest way for FME Flow users to collaborate and access the same content is by sharing it across users and roles.
Generally, sharing content on FME Flow follows one of these methods:
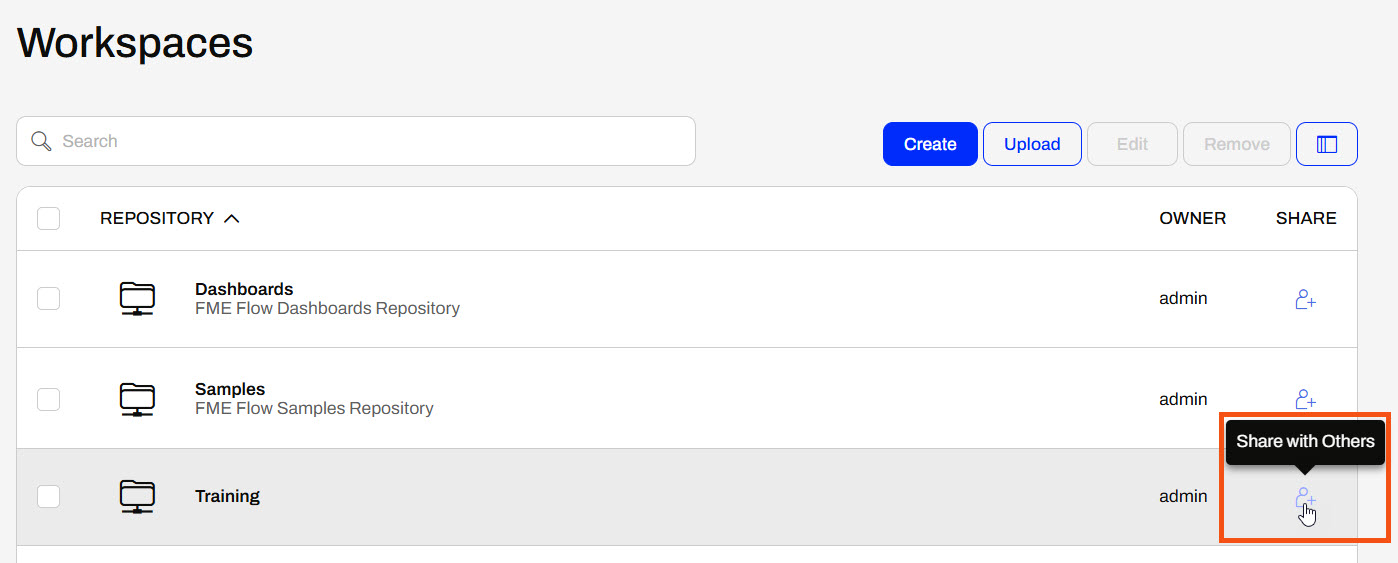
When you choose the Workspaces menu option in the FME Flow web interface, you will see a list of the repositories you can access.
If you own a repository, you can click the button to Share with Others.
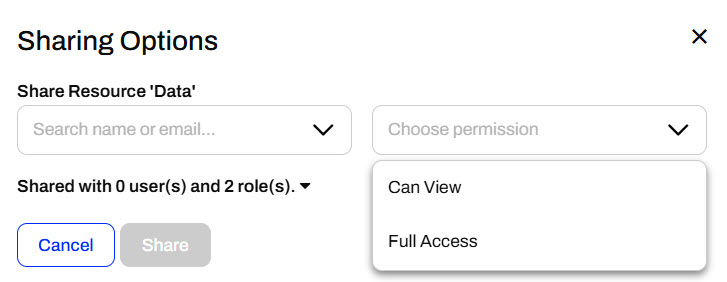
A pop-up dialog appears where you select a user or role and choose the level of permission that you wish to give them.
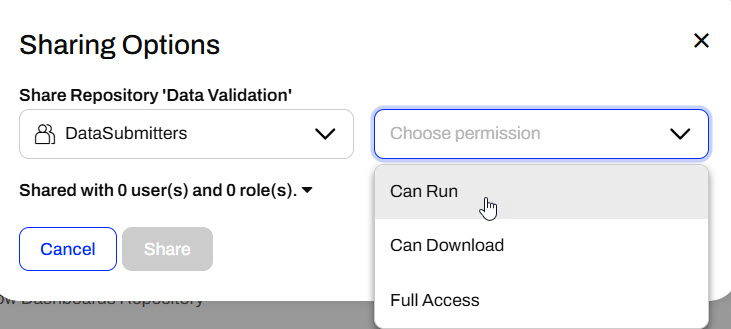
Users and roles also impact FME Flow security. Roles are analogous to a group of users. When sharing an item, you may select a combination of users and roles to give permissions. For example, you can give anyone in the fmeuser role the ability to run workspaces in a repository.
Security is a critical capability. You may create workspaces for multiple users on FME Flow. However, they must have access to use the workspace. The Sharing Options dialog allows you to give others access to your workspace without needing the advanced User Management permissions.
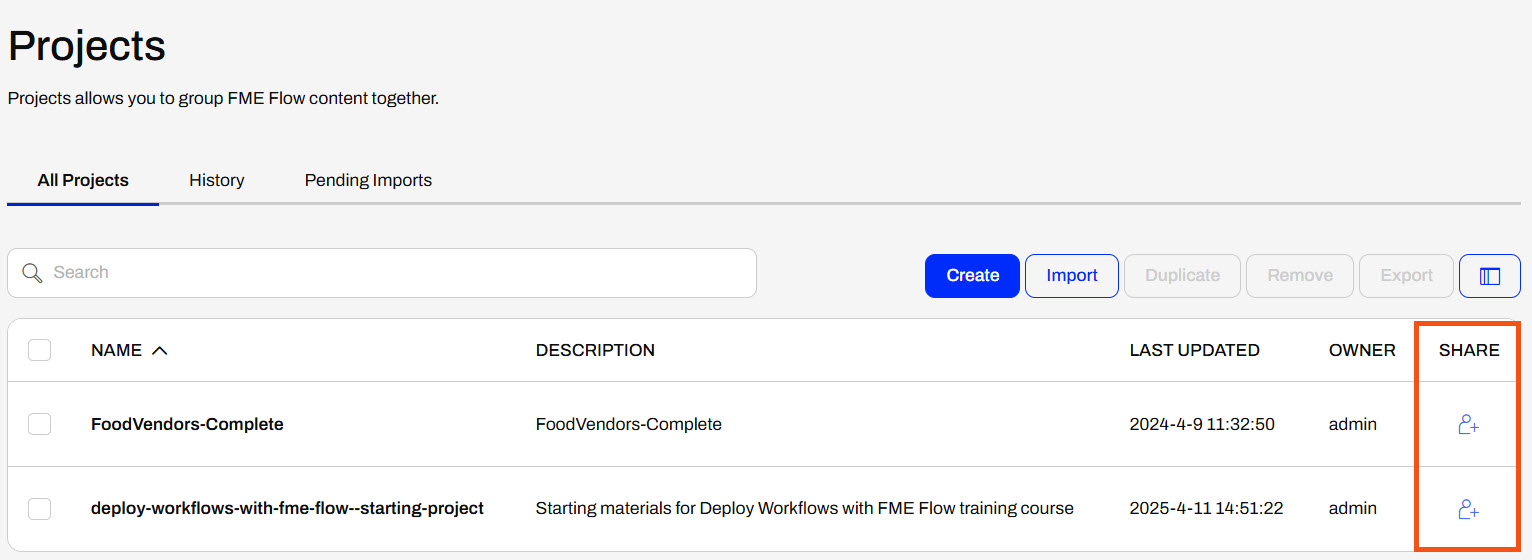
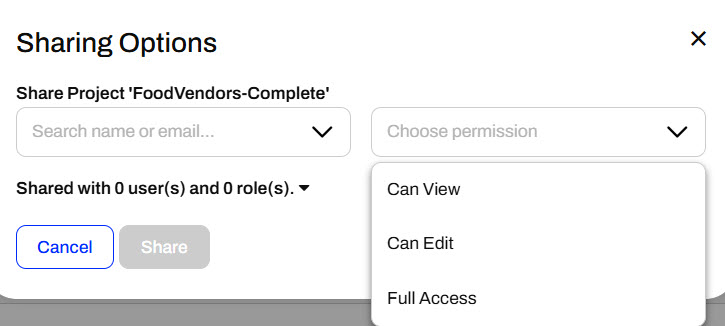
You share other items on FME Flow the same way you share repositories. The only options that differ are the level of permissions that you may grant to the user or role you're sharing with. For example, you can share Projects, which group FME Flow content together. The permissions options include options to view and edit the project, which differ from the Can Run and Can Download options for repositories. You will learn more about Projects in the following lessons of this course.
For example, when you share a Resource folder, you can only allow users to view the content or assign them full access.
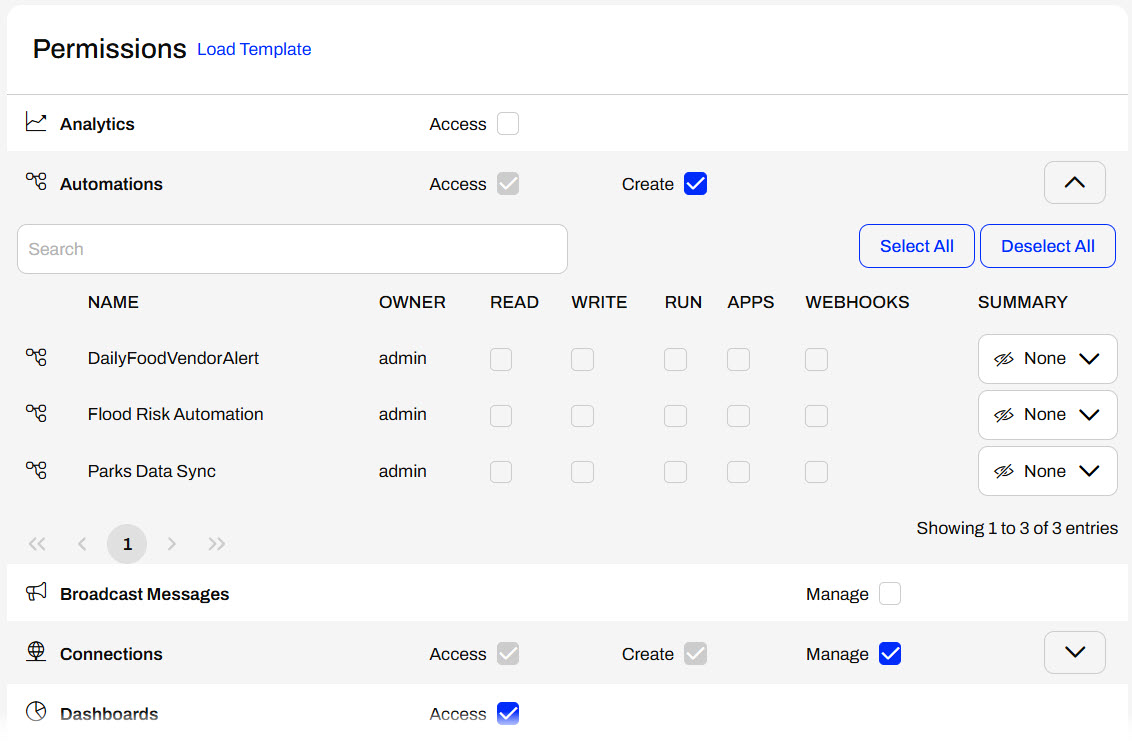
An FME Flow administrator may also manage access to items directly in User Management through Users, Roles, or Items. Permissions for users and roles work the same. You may grant permissions to all features and functions of FME Flow, or on an item basis. Some features have different levels of permissions, including Access, Create, and Manage.
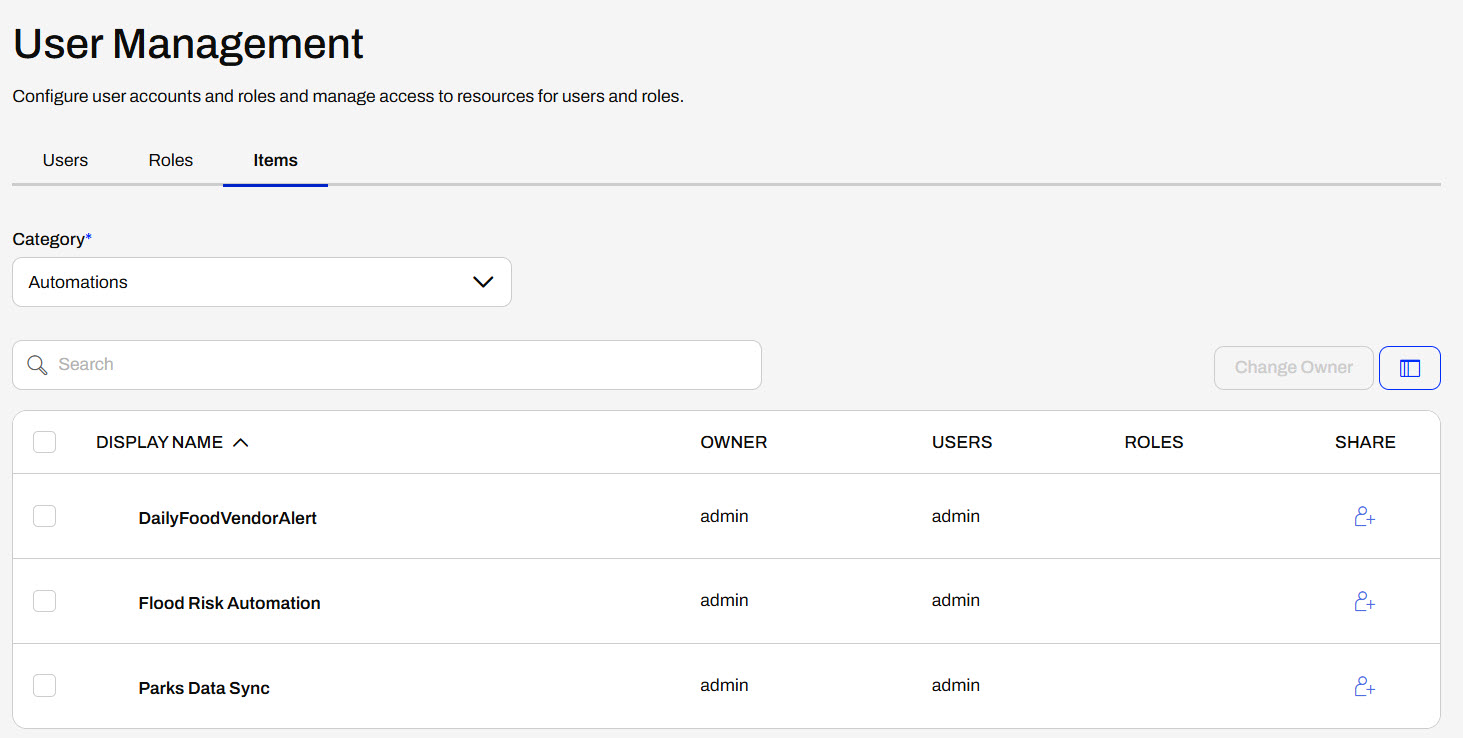
For items, you would select the content category on FME Flow and then grant permissions by sharing items to users or roles. You will see the same Sharing Options here when sharing from the item itself.

Frank, a GIS and FME Flow administrator, has a CAD data validation workspace on FME Flow for his city's Engineering and GIS departments. The workspace validates water line data and is running successfully as expected. Frank needs to share it with his colleagues so they can access and use the workspace on FME Flow.
For this exercise, follow along with Frank's steps.
If you're taking a live Safe Software-hosted training course or using an on-demand lab for this course, we've already imported the content required for this lesson into your FME Flow.
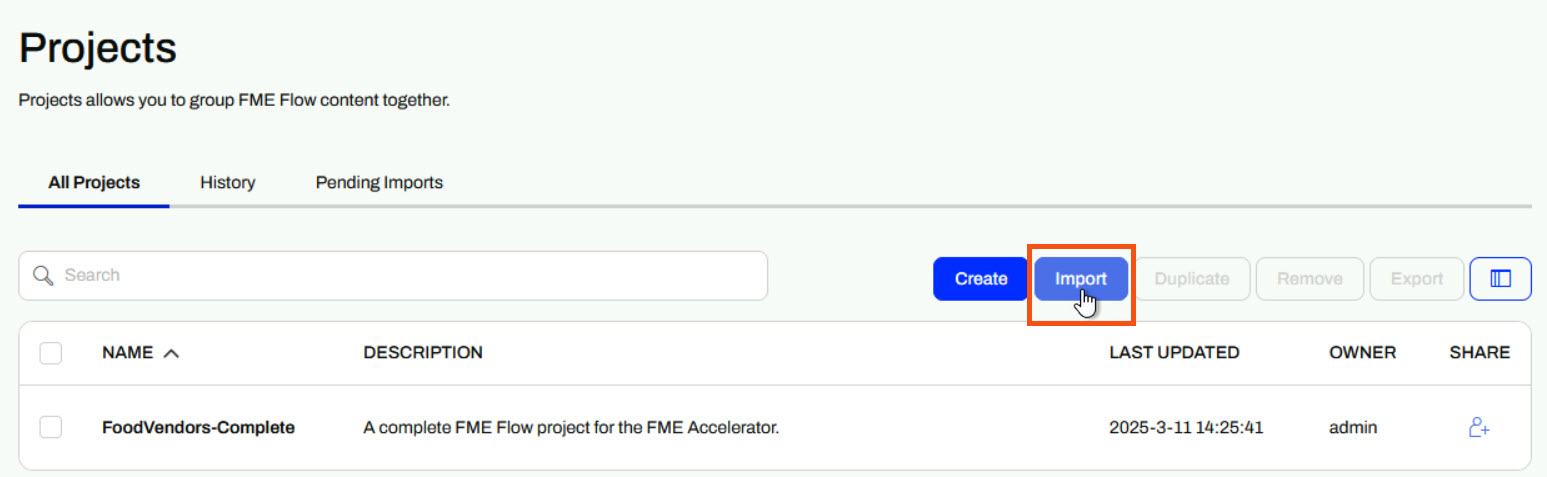
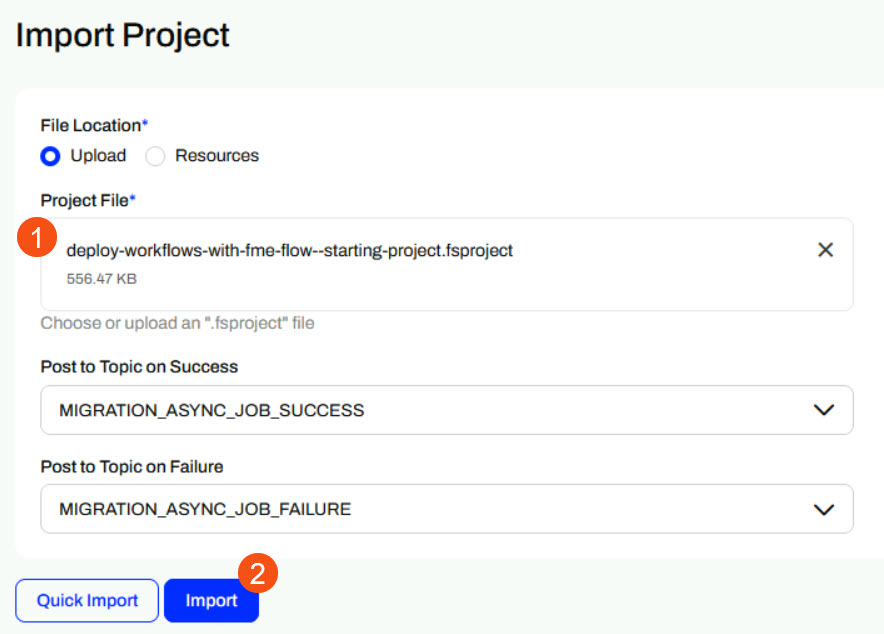
If you're completing this lesson with your own FME Flow, you must import the starting project with the content into your FME Flow. If you don't want to import this project on your own FME Flow, you can use existing content that you've created or Samples workspaces to share content.
After completing this lesson, you'll be able to:
FME Flow security and permissions work together to restrict and allow access to FME Flow items. It's essential to ensure users have access to the items they're supposed to, and oftentimes, only the admin account has access to all items on an FME Flow instance.
You have full permissions when you create an item; however, that does not mean your colleague can access it when needed. Depending on the permissions set up for each user to access FME Flow items, the easiest way for FME Flow users to collaborate and access the same content is by sharing it across users and roles.
Generally, sharing content on FME Flow follows one of these methods:
When you choose the Workspaces menu option in the FME Flow web interface, you will see a list of the repositories you can access.
If you own a repository, you can click the button to Share with Others.
A pop-up dialog appears where you select a user or role and choose the level of permission that you wish to give them.
Users and roles also impact FME Flow security. Roles are analogous to a group of users. When sharing an item, you may select a combination of users and roles to give permissions. For example, you can give anyone in the fmeuser role the ability to run workspaces in a repository.
Security is a critical capability. You may create workspaces for multiple users on FME Flow. However, they must have access to use the workspace. The Sharing Options dialog allows you to give others access to your workspace without needing the advanced User Management permissions.
You share other items on FME Flow the same way you share repositories. The only options that differ are the level of permissions that you may grant to the user or role you're sharing with. For example, you can share Projects, which group FME Flow content together. The permissions options include options to view and edit the project, which differ from the Can Run and Can Download options for repositories. You will learn more about Projects in the following lessons of this course.
For example, when you share a Resource folder, you can only allow users to view the content or assign them full access.
An FME Flow administrator may also manage access to items directly in User Management through Users, Roles, or Items. Permissions for users and roles work the same. You may grant permissions to all features and functions of FME Flow, or on an item basis. Some features have different levels of permissions, including Access, Create, and Manage.
For items, you would select the content category on FME Flow and then grant permissions by sharing items to users or roles. You will see the same Sharing Options here when sharing from the item itself.
Frank, a GIS and FME Flow administrator, has a CAD data validation workspace on FME Flow for his city's Engineering and GIS departments. The workspace validates water line data and is running successfully as expected. Frank needs to share it with his colleagues so they can access and use the workspace on FME Flow.
For this exercise, follow along with Frank's steps.
If you're taking a live Safe Software-hosted training course or using an on-demand lab for this course, we've already imported the content required for this lesson into your FME Flow.
If you're completing this lesson with your own FME Flow, you must import the starting project with the content into your FME Flow. If you don't want to import this project on your own FME Flow, you can use existing content that you've created or Samples workspaces to share content.


